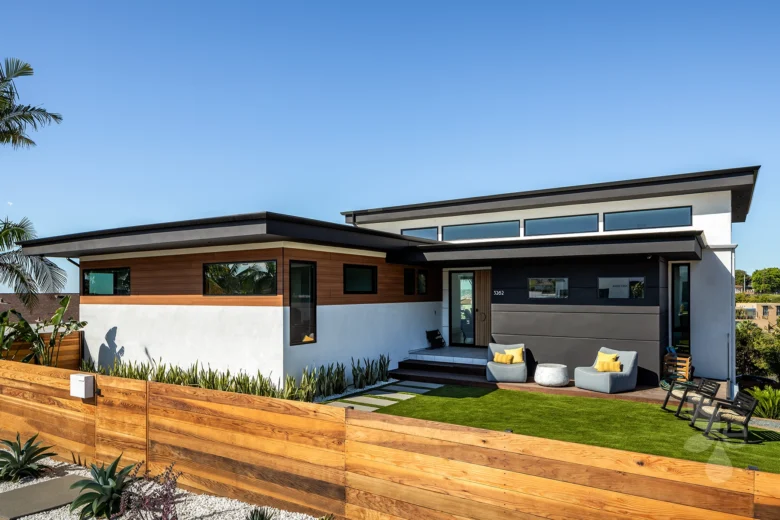
What Is an ADU?
Accessory dwelling units are known by many names. The terms used to refer to them can vary depending on location. Folks who live in Seattle may refer to these structures as backyard cottages while those in Australia may know them better as granny flats. If you’re a resident of San Diego, you may have also heard these structures referred to as junior or companion units.
Since some ADUs are made for specific purposes or carved out of already existing structures, you may also hear them referred to as basement apartments, pool houses, and carriage houses. You also have more general terms that are often used as alternatives for ADUs and these include guest houses and in-law suites.
It’s important to know those other terms used for ADUs so that we can all get on the same page and avoid any confusion. These supplemental residential units have been around for a long time. According to the United States Department of Housing and Urban Development, these units first started popping up early into the 20th century. They became really popular after World War II and they would continually emerge even as many local governments enacted rules to curtail their spread.
The 1970s would bear witness to more municipalities relaxing laws that allowed for the creation of more ADUs but they were lacking in certain respects. Today, ADUs are more widely accepted and you can probably have one built on your property provided that you follow the established laws and have the resources required.
Now that we have the names and history sorted out, let’s get down to what an accessory dwelling unit actually is. Is any structure you can enter and spend time in considered an ADU? Can you consider a toolshed an ADU? The keyword to consider here is dwelling. It’s not enough for a structure to have four walls and a roof. You also have to be able to live inside of it relatively comfortably.
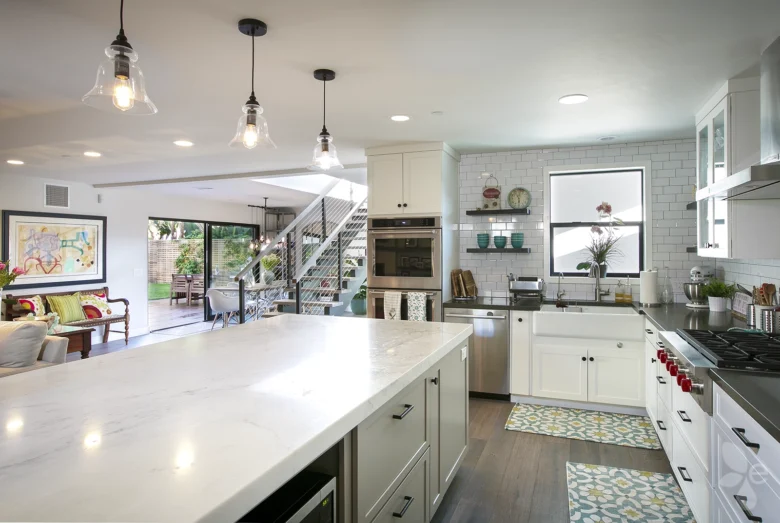
The United States Department of Housing and Urban Development notes that these separate living spaces must feature a kitchen and a bathroom. They also have to be built on single-family residential lots and they must be capable of existing independently of the main housing unit.
How in-law suites exist independently of the primary dwelling unit is another important thing for you to keep in mind. That’s why these accessory dwelling units are classified into three different types.
Three Types of Accessory Dwelling Units
As mentioned previously, in-law suites can also differ in terms of how they reside on the lot itself. Depending on what kind of home setup you have, you may be able to explore all three options for your home or you may be forced into one.
Interior Accessory Dwelling Units
The first option for you to consider is an interior ADU. It’s named as such because the unit itself is built from an existing room or space available inside your home. Ideal candidates for converting into interior ADUs include attics and basements, especially if they are already complete with their own entryways.
The advantage of having an interior unit built as opposed to the other options is that it cuts down on the amount of construction that needs to take place. You don’t need to pay for an entirely new set of walls or a ceiling because they are in place already. On top of that, you’re also converting a previously neglected space into one that can be used often.
Interior units can be more convenient and affordable but they may require some tinkering. Some pipes and wires may have to be repositioned to allow for the addition of a new bathroom and kitchen. They also don’t offer as much privacy compared to the other options.
Attached Accessory Dwelling Unit
Next up, you have what are known as attached ADUs. Attached ADUs differ from interior ADUs because the former isn’t converted spaces. They’re entirely new spaces that are simply connected to the primary housing unit. Attached units can be connected to the side or the rear portion of the home. They can also be built on top of a garage that’s already attached to your home.
Attached ADUs are great options if you don’t have plenty of space to spare on your property. They also provide more privacy. These units do tend to cost more than the interior options but you can make that money back by turning them into rental properties.
Detached Accessory Dwelling Units
Last up, we have what are known as detached ADUs. As you’ve probably already guessed, these are the units that are completely independent of the main residential unit. Technically though, they can still be connected to a garage as long as that garage is not attached to the primary home.
You have a better chance of attracting more tenants if you decide to have a detached unit built on your property. Tenants who live in detached units have more privacy and more freedom. Detached units also function better as party headquarters whenever you have some guests over because the noise and the mess can be contained into one area.
The main downside to opting for a detached unit as opposed to the other options is obviously cost. You’ll have to pay more to have that additional unit constructed and outfitted with the required amenities. Build it properly though and it could provide a big boost to your property value.
What Permits Do You Need to Build an Accessory Dwelling Unit?
Thus far, we’ve only highlighted cost as the potential stumbling block to you building an ADU on your property. That’s not necessarily the case for everyone though. It’s also possible that obtaining the permission to build your accessory dwelling unit will prove to be a greater challenge. You’re going to need a building permit if you want to move forward with your ADU project.
Securing that permit is easier said than done though as there are several requirements that need to be for met first. For this article, we’re going to focus on the specific requirements that residents of San Diego County will need to meet if they want to obtain a building permit for their accessory dwelling unit. The submittal requirements are as follows:
- Plans and calculations: Before you can start work on your ADU project, you will first have to map out what specific plans you have in mind for your property. This involves crafting the complete plans and accounting for the structural calculations. You will also be asked to secure a geotechnical report.
- Forms: You will also be asked to submit several forms as part of the application process. These include the general application form, the hazardous materials reporting form, the high-piled combustible storage form. Homeowners will also be asked to provide the affordable housing requirements and the storm water requirements applicability checklists along with the water meter data card.
- Payment: One more thing you’ll have to provide is the payment. The payment is expected at the same time that the other requirements are submitted.
Homeowners can now submit their requirements online via San Diego’s Development Services website. Simply create your account there and provide the required documentation. It’s a more convenient way to start the submission process.
It’s important to remember that you cannot just submit your documents and forget about them. Through the website, you’ll be able to see if the documents have been submitted properly and if they’re already being reviewed. If there are issues found with your submitted documents, officials will likely ask you to either provide additional documents or make revisions.
To ensure that your requirements can be reviewed promptly by county officials, take care to abide by the established submission guidelines. Failure to follow the guidelines can lead to your submitted documents being returned. You can also find your permit in the same Project Tracking System (PTS) used to monitor the submissions.
Specific ADU Regulations for San Diego County Cities
This next section focuses on specific regulations related to ADUs across different San Diego County cities. The details come courtesy of Housable.
Carlsbad
In Carlsbad, the ADU should not be over 14 feet in height if a minimum roof pitch of 3:12 is provided. If less than a 3:12 roof pitch is provided, the ADU cannot go over 10 feet in height. However, those height requirements are not in play if the dwelling unit is built over a detached garage.
The accessory dwelling unit must also pair well with the primary home on the lot in terms of appearance and materials used. One must also be able to enter the ADU without having to go through the main unit first.
Del Mar
The maximum height of allowed ADUs in Del Mar will be determined by the height of the underlying zone. A separate entry and exit point from the primary unit is also required. Restrictions on the style of the ADU are not specified.
Encinitas
The maximum height of ADUs built in Encinitas shall be based on established local standards. If local standards have not been specified, the height limitations of the underlying zone will be referenced. There are no specific style standards established for ADUs by the city of Encinitas. Passageways are also not required if homeowners want to build an accessory dwelling unit on their property.
San Diego
21 feet is the maximum height for the ADU you’re constructing in San Diego if it’s established above a garage or some other building. Meanwhile, detached ADUs cannot be taller than 17 feet if they have a chimney or a flue and they must be no taller than 15 feet if they don’t have either a chimney or a flue.
The design of your ADU should be similar to the primary dwelling unit. The exit and entry point for your ADU must not be located on the building street wall or within the front 50 percent of the structure. It should also have its own entry and exit point that is independent of the main residential unit.
What Are the Size Limits on Your Accessory Dwelling Unit?
When drafting up your plans for the new residential unit, you have to keep the size limitations in mind. In San Diego County, the ADU can only be 50 percent as big as the SFD or single-family detached housing. Also note that the accessory dwelling unit can only top out at 1,200 square feet in size regardless of how big the SFD is. Those size restrictions are in place regardless of whether you’re having an attached ADU or a detached ADU constructed.
Steps for Creating an Accessory Dwelling Unit
Now that we’ve identified your different options for ADUs, listed the requirements, and acknowledged the restrictions, we can now move on to the project itself. The steps for completing the project must be followed adequately or else you run the risk of creating a suspect establishment. The entire process of creating the accessory dwelling unit can be broken down into three specific stages. Let’s start with the pre-construction stage.
1. Pre-Construction
This is the stage where you get everything in order in advance of starting the project proper. Make it a point to finish all the pre-construction steps before getting the project started so that you can pinpoint a general timeline for its completion. Getting all your ducks in a row like this also ensures that you won’t have to constantly stop and start the project as you wait for paperwork to be cleared or for essential personnel to be selected.
Secure Pre-Loan Approval
You can certainly pay for the construction of an accessory dwelling unit out of your own pocket but that’s not a realistic option for many homeowners. Instead, they opt to secure a loan from a bank and use that to finance their new project.
This is something you should get the ball rolling on well before you give the green light on the construction. Going through the pre-loan process will help you determine how much money you can pour into the construction of the accessory dwelling unit.
Start by contacting your bank and ask about the requirements for pre-qualification. Once you’ve provided the requirements such as your list of assets, your income number, and an accounting of any outstanding debt you have, they should be able to give you a ballpark number of how much you can borrow. Note that the number they give you is not actually the final amount they’ll commit to because they still have to conduct a more thorough review of your financial background and capabilities first.
That more thorough review takes place as part of the pre-loan process. During this process, the lender will take a closer look at your financial background and also check your credit rating. This is also the part of the process where you’ll need to formally fill out a loan application form.
After you’ve submitted the form and the lender has finished their review, they will decide on whether or not to pre-approve you for the loan. If you’ve been pre-approved, you’ll be handed a conditional commitment in writing that details the exact amount of money you can borrow, according to Investopedia. The lender may also tell you what interest rate will be attached to your loan and you may be given the chance to lock in that rate.
Develop a Building Plan
You cannot be approved to build a companion unit if you don’t have a building permit. And you’re not getting that building permit unless you submit a design of the unit itself first.
This is where you may want to start working with the professionals because drafting a building plan on your own if you’re inexperienced is an enormous undertaking. You may think that you’re making great progress but you may also be failing to recognize numerous violations you’ve made.
Homeowners who want to make the design process easier can go ahead and check out the plans available via the Permit Ready Accessory Dwelling Units Program, which is otherwise known as the PRADU Program. The program offers access to a wealth of permit-ready plans that can also be customized based on your needs and preferences.
Apply for City Approval
We’ve already gone over this earlier so just to recap, you’ll need all of your plans, forms, and payment in order ahead of submission. Make sure that your documents abide by the guidelines and then submit them to your city government using the Development Services Website. Use that same website to track how close you are to receiving your building permit.
Hire an Architect
Expect to be busy once you decide to start an ADU project. Completing even just the steps mentioned previously will likely consume much of your free time. By hiring an architect, you can effectively remove a few tasks from your likely very crowded plate. Remember those troublesome plans that you simply cannot figure out? Your architect can handle those as well as the other parts of the permit-securing process.
When searching for the right architect to hire, make it a point to find someone who has extensive experience working in your area. A professional with that kind of expertise will be less likely to make crucial mistakes that could delay a project. You should also search for an architect you can communicate with easily because the two of you will be spending a lot of time discussing the particulars of the ADU construction.
Hire a Contractor
The architect is just one of the professionals you need to hire for your ADU project. Partnering up with a San Diego home contractor is in your best interests as well.
Contractors will help you find the right workers for your project and they can also connect you to the suppliers of the materials you’ll need. Simply put, contractors can make the entire project more manageable, which is ideal if you know you’ll be busy with work and other matters.
During the hiring process, you should remember to check if the contractor you’re eyeing is properly licensed. Feel free to talk with their previous clients as well and see how they viewed the work they did. Meet with the contractor yourself so you can see if they fit your criteria.
Secure Bids From Your Contractor Candidates
Ahead of making a final decision on who you’ll hire as the contractor for your project, you should send bid invitations to your chosen candidates. Bid invitations will help you pinpoint which contractors line up best with your budget. You don’t necessarily have to pick the lowest bidder but you should select the contractor who you believe is offering the best value proposition.
Get Your Payments in Order
You’re nearly done with the pre-construction stage but you cannot forget about the financing. If you did apply for a loan earlier, now is the time for you to take that out. If you’re paying out of pocket, you should have the checks ready as well so that the project can begin in earnest.
Prepare the Construction Contract
The last part of the pre-construction stage involves putting together the contract. According to The Balance, a typical construction contract includes the description of the project, the contract price, the payment basis, the schedule of the project, the document list, the scope of the project, the conditions and responsibilities, and the contract laws.
Be very clear with the terms laid out in the contract and make sure that the contractor understands it completely. The financial terms should also be clearly detailed to prevent any confusion and/or contention when the time comes to make payments.
2. Construction Management
With the planning out of the way, you can officially start work on your accessory dwelling unit. Since you went through the trouble of making all the necessary preparations and hiring the right people, this stage should prove easier to handle.
Post the Permits
Don’t forget to post all the necessary permits unless you want to run afoul of the law. Posting the permits ahead of time will also minimize the amount of people in the neighborhood complaining about your project. Make the permits easy to see so that anyone coming by can quickly figure out what’s going on.
Implement Change Orders (If Necessary)
Change orders become necessary when certain aspects of the project require alteration. You may want to add to the scope of the project or perhaps subtract a few tasks from it. It’s your call.
Regardless of what kind of amendments you want to make to the original plan, you will have to rely on change orders to make them happen. The change orders will also document any changes made to the payouts or to the expected completion date of the project.
Handle the Construction Close-Out
The construction close-out process involves handing over the completed project to the owner. The contractor may take on the role of handling the construction close-out as it involves managing the subcontractors hired, the equipment rentals, and waste cleanup. All of those things must be in order before the completed accessory dwelling unit is formally handed over to the owner.
Construction close-out also entails the final cleanup of the job site, handing over documentation to the owner, and recapping the entire project itself. As the owner of the new property, you should also make use of this opportunity to ask any questions you may have.
Host the Final City Inspection
With the companion unit completed, the final city inspection can officially take place. Your contractor can help you arrange this visit, which is why it’s essential to find one who knows your neighborhood really well.
The city inspection will conduct a thorough inspection of the new unit. If the unit meets all existing standards, it will receive approval to occupy from the government.
Create a Punch List
Punch lists detail issues with the construction project found prior to completion. For instance, you may have requested a bathtub to be installed in the accessory dwelling unit but the workers haven’t gotten to that yet. You can include that in your punch list. Creating a punch list helps the workers identify which additional matters they need to fix before a project can officially be deemed complete. Punch lists also help clarify why certain disputes are happening.
Resolve Any Remaining Disputes
Hopefully, all the efforts you made during the pre-construction phase will lead to no disputes arising over the course of the project. That’s not guaranteed though.
Disputes can be resolved in a variety of ways. You and the other party can just hammer out an agreement on your own or bring in a neutral third party via adjudication, arbitration, or mediation. If the two parties cannot reach an agreement, the matter may also be resolved in court.
As much as possible, you obviously don’t want any disputes to escalate to the point where third parties have to be brought in. Finding a contractor who you trust and see eye-to-eye with will help you avoid that kind of escalation.
Release the Retention
Retentions are mainly used by employers to motivate contractors. Employers will usually hold on to about three to five percent of the payment indicated in the contract and that is not released until the end of the defects liability period. You can effectively motivate the workers to complete the job properly and efficiently with the help of retention.
3. Challenges During Construction
Before we discuss the final stage of creating an accessory dwelling unit, let’s first tackle some of the challenges you and the workers may encounter during the pre-construction and construction phases. Some of these challenges are unique to ADU construction because of the nature of the structure being built.
Worksite Is in a Densely Populated Area
Densely populated areas present a lot of issues during construction. The workers may have to constantly watch out for any residents and pets who approach the job site. The workers may have to spend just as much time watching out for people as they do completing their tasks.
Worksite Is Difficult to Access
Even though ADUs are smaller compared to SFDs, some big pieces of equipment may still need to be brought in when constructing them. If the worksite is surrounded by homes or is only accessible via narrow streets, getting the right equipment there can prove to be a challenge unto itself.
Worksite Is Small
The size of the worksite could also prove to be an issue. In places where the homes are clustered pretty close to one another, the workers may not have much room to operate.
Not Enough Storage Space for the Construction Materials
An often overlooked matter on worksites is the availability of storage space. The workers may not realize that storing the materials will be an issue until it’s too late. At that point, the contractor may need to scramble just to find a suitable container or storage space for the materials.
Interactions With the Neighbors
Some neighbors may get curious about your new ADU while construction is taking place. Because of that, they may decide to come over and converse with your workers. Your other neighbors may be unhappy with all the noise and lodge complaints.
You obviously want the workers to focus on the construction of the unit. However, you also cannot ignore your neighbors or else you run the risk of alienating the other members of your community.
How to Tackle Challenges During Construction
The challenges listed above can be difficult to resolve on your own. That’s yet another reason why partnering with a good contractor is crucial. With the help of an experienced contractor, you’ll be able to figure out how to complete the project even if the worksite is a small property located in a densely populated area. Experienced contractors also know how to deal with folks who complain about construction projects so they’ll be able to help you have productive conversations with your neighbors.
Post-Construction
We are now in the last stage of the ADU construction project. For this stage, you’ll focus more on completing some important documentation.
Figure Out Your Loan
If you did indeed take out a loan to finance the construction of your new accessory dwelling unit, you now have to figure out how to manage that. You have two options to consider here. You can either turn the loan into a permanent mortgage or take out a separate loan to pay the construction loan from earlier. Take the time to examine both options closely here as your choice will heavily influence your finances moving forward.
Record a Covenant Agreement With the City
Next up, you’ll have to work on finishing your covenant agreement with the city. This is not something you can afford to delay as you’ll need it to obtain the title to your property. Settle this matter right away to avoid any legal headaches in the future.
Start Using the Accessory Dwelling Unit
With the construction completed and the documentation settled, all that’s left to do is to make use of your new accessory dwelling unit. Perhaps you can call your parents over and give them the opportunity to enjoy the newly built unit first.
Building an accessory dwelling is a huge undertaking but it doesn’t have to be a difficult one. Work with us at Eco Minded Solutions and we’ll make sure that your project turns out exactly how you envisioned it. Contact us today to learn more about the services we provide.
Accessory Dwelling Unit FAQs
What Does ADU Mean?
ADU stands for accessory dwelling unit and it refers to secondary homes built on a property. The ADU is smaller than the other home present on the lot. ADUs are also equipped with a kitchen and bathroom to make them suitable living spaces.
Can I Build an ADU on My Own?
You can take on an ADU project on your own but considering all the legal matters to handle, the plans to create, and the actual construction, it will be a Herculean task to attempt alone. Don’t hesitate to work with architects and contractors as they will help make the project more manageable.
What Is a Backyard ADU?
A backyard ADU is also known as a detached ADU. Backyard ADUs are completely detached from your primary home. They offer more privacy to residents and can be more attractive to potential tenants.
Are ADUs Legal In California?
Yes, ADUs are indeed legal throughout California. However, there are limitations on how big they can be and where specifically you can build them. Make sure to clarify with your city that your project is allowed before moving forward.
Does an ADU Increase Property Value?
ADUs are known to increase a home’s property value. 33 percent of the respondents to a survey conducted by the National Association of Realtors revealed that they are willing to pay around $3,000 more for a home with an in-law suite. ADUs can also be an additional selling point that separates your home from other available properties.
How Long Does It Take to Build an ADU?
The length of construction time will largely depend on the size of the accessory dwelling unit. Larger ADUs can take up to a year to complete. If you’re going for a smaller detached unit, it may take around six to seven months to complete.
Can I Build an ADU for Rental Income?
Homeowners are allowed to build ADUs for the purposes of renting them out. You can even make a good amount of money from renting out a detached unit. As long as you abide by the fair housing laws, there should be no issue with you renting out your ADU.
ADU Builders in San Diego
Some of the locations our ADU builders serve include: Carlsbad, Cardiff, Encinitas, Del Mar, Rancho Santa Fe, and more.